Private Email Support
Online resources and support for Private Email.

Support by product
-
Fast Start
Online resources and help for Private Email accounts from Total Digital Security.
-
MFA - Multi-factor Authentication
This is a guide to managing multi-factor authentication for TDS Webmail.
-
Identify Email Spoofing
This article describes how Private Email from TDS on webmail identifies suspicious emails
-
Stopping Spam
For our customers and clients with Private Email accounts by Total Digital Security.

Private Email SupportCenter
As a Total Digital Security customer, your Private Email account includes your own SupportCenter.
Your SupportCenter portal is customized to with the information you need specific to your email box and services, including:
- SetUp Email
- Fix Something
- Cloud Drive
- Stopping Spam and Junk
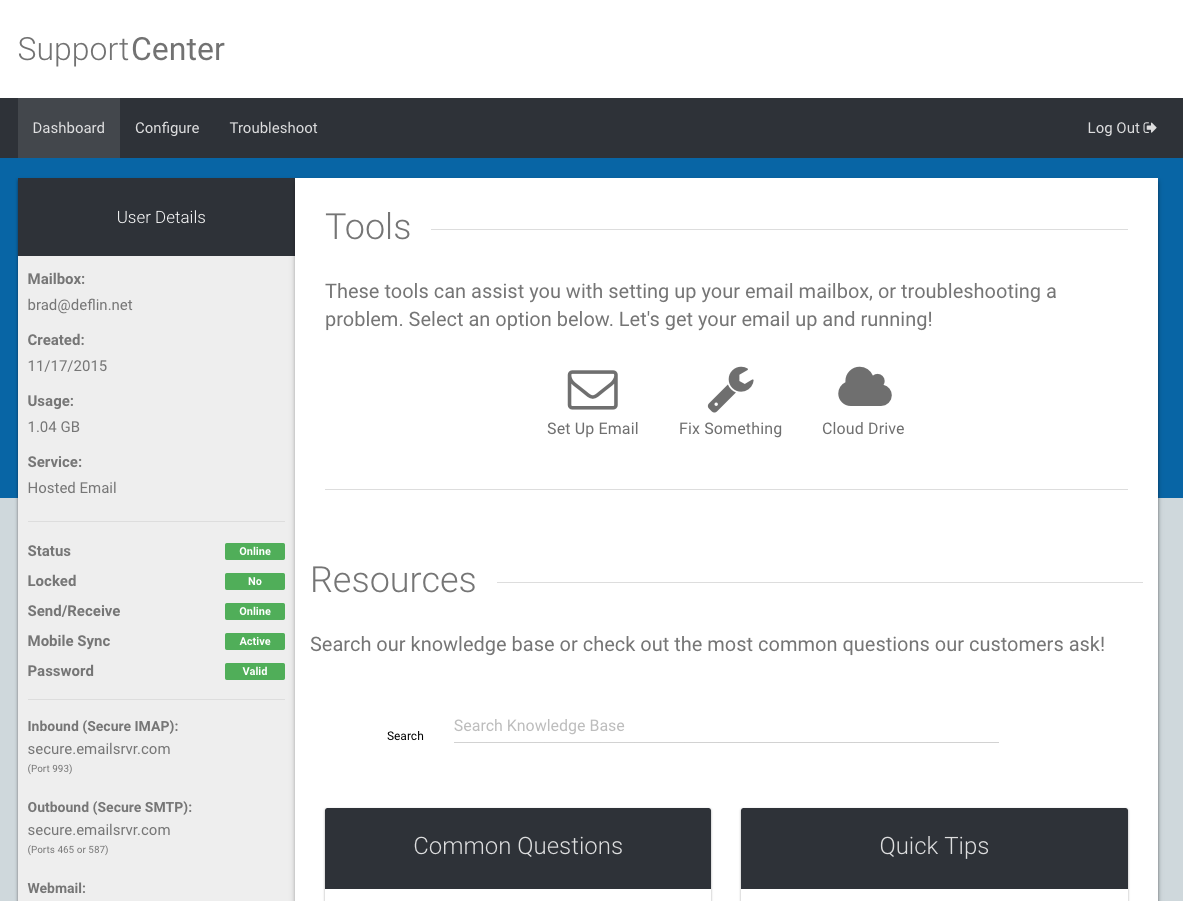
- Trending Solutions, Common Questions, and Quick Tips
Migrating to Private Email
For the migration tool and instructions, click here:
New to Private Email accounts from Total Digital Security?
Frequently Asked Questions
-
How do I reset a lost password?
Password Recovery and Reset
You can recover your password from the "Forgot Password" function on your webmail sign-on page.
Or email us with your request. Include your phone number so we may verify the change.
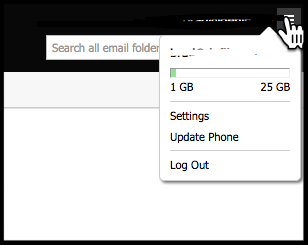
To change your password, log in to webmail and change your password from the Settings drop-down menu.
-
Where I can find migration instructions?
-
How do I find Source Server information?
For instructions on how to find the Source Server information for your email account, go here.
-
How do I get my mail folders to behave across Mac Mail?
Change Mailbox Behaviors preferences in Mail on Mac
Use Mailbox Behaviors preferences in Mail to change where draft, sent, junk, deleted, and archived messages for an email account are stored.
 To change these preferences in the Mail app on your Mac, choose Mail > Preferences, click Accounts, then click Mailbox Behaviors.
Note: Mail stores messages in the mailbox you specify for each option.
-
If you select a mailbox on the mail server, the messages are available when you use your email account on another computer. Mail selects the best mailbox for your account; before choosing a different server mailbox, check with your email account provider.
-
If you select an On My Mac mailbox, the messages are stored on your Mac and are available only there.
The settings you see vary depending on your account type.
Option
Description
Drafts Mailbox
Select a mailbox on the mail server or on your Mac to store draft messages.
This option is available only for IMAP accounts.
Sent Mailbox
Select a mailbox on the mail server or on your Mac to store sent messages.
This option is available only for IMAP accounts.
Junk Mailbox
Select a mailbox on the mail server or on your Mac to store junk messages.
This option is available only for IMAP accounts.
Note: Select this option on each Mac where you’ll use your account, to avoid having two Junk mailboxes in the Mail sidebar.
Erase junk messages
Mail automatically deletes junk messages at the specified time. Select a setting other than Never to avoid exceeding storage limits set by your email account provider.
Trash Mailbox
Select a mailbox on the mail server or on your Mac to store deleted messages, or choose None (deleted messages are removed and aren’t available in the Trash mailbox).
This option is available only for IMAP accounts.
Erase deleted messages
Mail erases deleted messages at the specified time. Select a setting other than Never to avoid exceeding storage limits set by your email account provider.
If you selected None for Trash Mailbox, you can have Mail permanently delete messages automatically.
If your email account provider sets up the server to delete older messages, the messages are deleted regardless of how you change this option.
Archive Mailbox
Select a mailbox on the mail server to store archived messages.
If you use an Exchange account, you can choose to store draft, sent, junk, and deleted messages on the server, and when to erase junk and deleted messages.
-
-
What are the server settings for Private Email accounts from TDS?
Rackspace Email and Hosted Exchange settings
To set up your email hosted by Rackspace on either your desktop email client (like Outlook or Mac Mail) or on your mobile device, you can use our Email Help Tool or enter the settings manually.
Email Help Tool
The Email Help Tool guides you through the entire setup process. The tool automates the setup process for supported email accounts and clients, or provides instructions for manually configuring your client.
Access the tool at Rackspace Email Help Tool.
Manual configuration settings
If the Email Help Tool doesn’t offer instructions for your mail client or if you want to set up your client directly, you can manually configure your email client or device by using the settings in this section.
Note: If your email uses an Exchange mailbox and you don’t want to set up the connection as IMAP or POP, you can find information for specific clients and devices in Configure email clients and mobile devices for email hosted on Exchange.
To learn more about the differences between IMAP and POP, see IMAP and POP mail protocol comparison. We recommend using IMAP for the incoming mail connection.
Secure settings (recommended)
The following server settings provide a secure (SSL) connection:
Protocol SSL server name SSL port number POP3 (incoming) secure.emailsrvr.com 995 IMAP (incoming) secure.emailsrvr.com 993 SMTP (outgoing) secure.emailsrvr.com 465
Alternative settingsWarning: The following alternative server settings do not use SSL and therefore do not make a secure connection to the mail server.
Protocol SSL server name SSL port number POP3 (incoming) pop.emailsrvr.com 110 IMAP (incoming) imap.emailsrvr.com 143 SMTP (outgoing) smtp.emailsrvr.com 25, 587, 8025, or 2525 -
What is Cloud Drive used for?
Here is an animated explainer on using your Cloud Drive feature, standard with every private email box from Total Digital Security:
-
How do I import contacts to webmail?
How to import contacts to your webmail Private Email box from Total Digital Security:
First, locate your contacts .csv file, or create one by exporting your current contacts from another application.
- Log in to your webmail mailbox.
- Click the Contacts tab.
- Click Import/Export Contacts.
- Under Import Contacts, click Choose File.
- Save the .csv file that contains the contacts that you want to import.
- Click Continue.
- Verify the information for each imported contact. Click Next and Previous to scroll through the contact list.
- After you verify that all contacts are correct, click OK to complete the import.
-
How do I manage Spam and Junk in my Private Email Account?
First, sign in to your webmail.
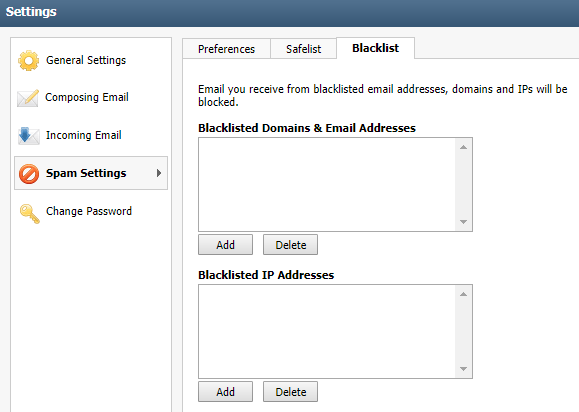
In your webmail, in Settings>Spam Settings, manage your preferences here:

When you blacklist an email address, domain, or IP address, it stops mail sent from the source that you specified. Using a blacklist can help stop spoofing or spam. To safe-list a sender see Safelist addresses, domains, and IP addresses in Rackspace email.
Warning: Use caution when blacklisting entire domains or IP addresses, because you might unintentionally block legitimate mail.
For a video tutorial see Email Help - Blacklisting / Safelisting With Email.
Blacklist an email address or domain
-
Log in to your mailbox on webmail.
-
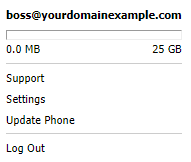
Click your email address in the upper right-hand corner, and select Settings from the menu.
-
Click Spam Settings on the left side of the pop-up box, and the select the Blacklist tab.
-
In the Blacklisted Domains & Email Addresses box, click Add.
-
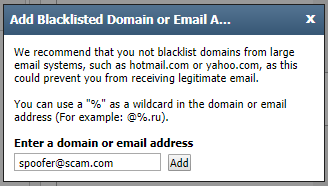
When prompted to Add Blacklisted Domain or Email Address, enter the domain or email address that you want to blacklist in the field under Enter a domain or email address, and then click Add.
-
Confirm that the address is now listed in the box under Blacklisted Domains & Email Addresses, and click Save.
Blacklist an IP address
If you need to blacklist an IP address, follow steps 1-3 in the preceding section, and then complete the following steps:
-
In the Blacklisted IP Addresses box, click Add.
-
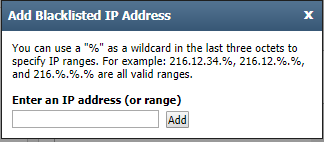
When prompted to Add Blacklisted IP Address, enter the IP address you want to blacklist in the field under Enter an IP address(or range), and then click Add.
-
Confirm that the address is now listed in the box under Blacklisted Domains & Email Addresses, and click Save.
Refer to this article for tips.
-
-
Why is my email slow to load and says "loading...?"
If you are experiencing slow loading of your emails, including in webmail, and get a yellow message saying "Loading..." try this:
The mailbox is most likely trying to re-index itself and you may need to clear out your browser cache and cookies - this is normal and with all our activity on the internet, and its something that we need to do every few months at least.
So clear up your browsers' cache and cookies, be sure your browser is updated to the latest version, and then restart the computer.
To find directions on clearing cache and cookies, just Google search “How do I clear browser cache in (browser type)” as an example, and instructions will come right up for you.
Image of slow loading message:

-
How do I check the system status for my email account with Total Digital Security?
Your email domain with Total Digital Security is hosted on Rackspace's enterprise-class servers and systems.
To check the host's system status, click here:
https://status.apps.rackspace.com/index/viewincidents?group=100
-
Is my email encrypted?
Private email accounts from Total Digital Security include TLS and SSL encryption features. This should not be confused as "end-to-end" encryption.
For more on TLS and SSL encryption, please click below:
https://support.rackspace.com/how-to/tls-ssl-encryption-cloud-office/
For end-to-end encryption, Office 365 and Azure upgrades are required and available from Total Digital Security. -
How do I add an email signature?
Be careful about what you include in your email signature. The wrong information can limit the deliverability and it might be viewed as spam by most email filters.
- see Rackspace's Best practices for sending person-to-person email for guidance on the signature creation
Now, sign on to your webmail.
Click Settings in the upper-right corner of the page
- click Composing Email
- click the Signatures tab
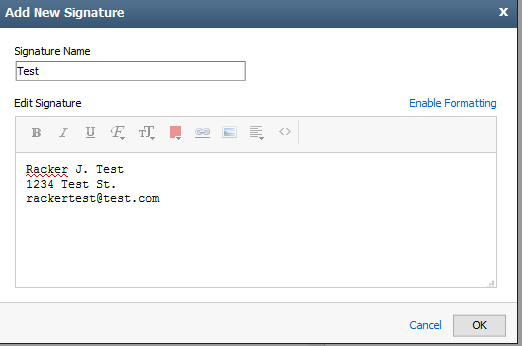
- click Add New Signature
- enter a descriptive name for your signature
- in Edit Signature enter your desired text for your signature
You can use plain text, HTML, or rich text with the formatting options available in the editor (for example, bold, italics, and colored text).
Note: If you switch to plain text, you lose any HTML formatting that you have applied.
-
Select OK to return to Settings
-
click the name of your signature file in Current Signatures and choose any of the additional options
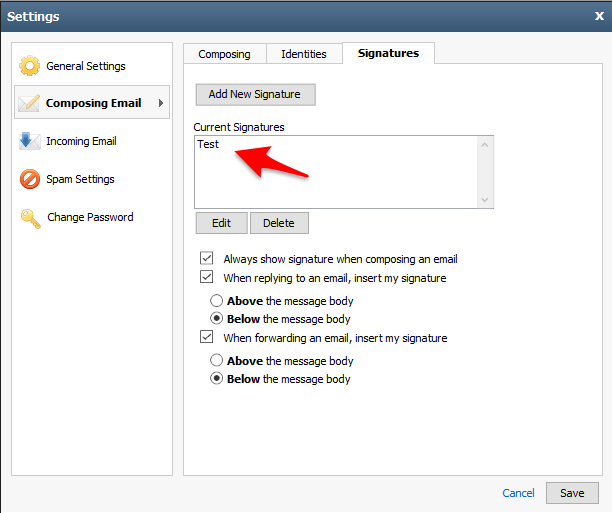
- you can automatically insert the signature when composing a new email by selecting the Always show ... check box.
- for automatic insertion when replying, choose select the When replying to an email, insert my signature checkbox, and choose whether the signature should appear above or below the body of the message
- to auto-insert the signature when forwarding an email, click the When forwarding an email, insert my signature checkbox, and pick whether the signature should appear above or below the body of the message
-
Save
-
click the Identities tab, double-click your email address, and enter the information
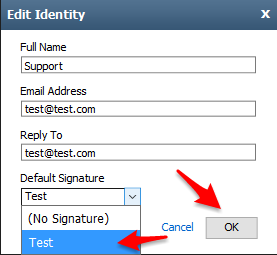
- Full Name - this will appear in the From field of messages you send
- Email Address: put in the email address that should be displayed as the From email address by your recipients
- Reply To: enter in the email address you want recipients to use when a reply is sent to your email message - if this field is left blank, the address you entered in the Email Address box is used automatically
- Default Signature: select a signature to use with this identity
-
click OK
When composing an email, you can change identities by clicking the From drop-down menu in your webmai, at the top of the Compose Email window
-
How do I save documents to Cloud Drive?
Be sure you have installed Cloud Drive to your device.
If you need to install Cloud Drive, see Installing Cloud Drive.
-
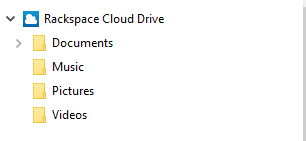
Select the file explorer application.
-
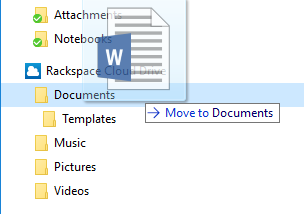
Copy or move the file :
-
Verify

-
-
How do I install Cloud Drive to my device?
Cloud Drive Set Up Wizard
See the quick tutorial on Cloud Drive for your desktop and synchronization:
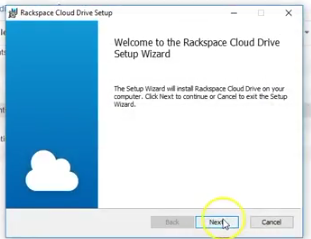
Video - Cloud Drive Installation for Private Email on Rackspace
For more:
-
What are the technical specifications for compatibility?
Technical Specs for email migrations:
- IMAP to Rackspace Email or Office 365
- Exchange 2003/2007/2010/2013/2016 or IMAP to Microsoft Exchange or Office 365
- Calendars, Contacts, Tasks, Notes (See full list of compatability)
- Get started with the MigrationWiz™ tool:
- Check out the Video Tutorial and read the MigrationWiz Documentation
- Keep in mind that Rackspace Email and Exchange boxes will need to be migrated separately
-
How do I migrate from Gmail and Gsuite?
If you are using a free Gmail:
Here is the information needed from Gsuite with our migration tool: https://help.bittitan.com/hc/en-us/articles/115008106967-Enable-access-to-G-Suite-using-OAuth-2-0
-
Using and Syncing Calendar?
-
How to Avoid Email Spoofing?
our webmail from TDS includes suspicious email identification. Click for more:
-
How do I manage multi-factor authentication?
For managing multi-factor authentication with Private Email Webmail accounts, click here:
https://www.totaldigitalsecurity.com/support-resources/private-email/multi-factor-authentication
Recent Articles
Behind the Scenes: The Future of Your...
June is here, and we're thrilled to share some of the...
Read More
Chinese "Smishing" Operations: A Growing...
This month, I want to bring your attention to a...
Read More
Staying Ahead of Cyber Threats With AI - TDS...
Since 2013, Total Digital Security (TDS) has been...
Read More
Why Clients Trust Total Digital Security
“TDS took the time to walk me through the install even though it was very straight forward. They have been very quick to respond to any questions I had. I would highly recommend them.”
“I was having all types of computer spam, malware and pop-ups on all the different computers in my office and the ones outside staff use as well. After a few days the issues are gone completely. The follow up from TDS staff is top notch, ask a question and a few minuets later the answer is there in your inbox.”
TDS was great. I had an issue, emailed them and they got RIGHT back to me. They continued to email me letting me know what was going on. Great customer service.
Ready to secure your digital life?
A quick, no-obligation call with TDS lets you size up your cyber risks and see exactly which privacy-first solutions fit best. No pressure, just clear options you can act on.